The Easy Way to Make Presentations & Stories
BoardJS is a JavaScript library that simplifies the way of making interactive presentations, stories and ads.
The library works by writing commands such as adding texts, images, moving objects and showing tooltips, and once the .go() function is called, commands will be executed one by one.
The list of commands will be interpreted in the library as a timeline.
If you are familiar with animations in Microsoft Office, you will notice that BoardJS is the a bit the same but for developers and more interaction.
The benefits and features of the library are:
- Optimized and fast
- Cross browser and platform
- Changes the presentation without refreshing the page
- Applies commands to more than one object at a time
- Easy to update presentations
- Uses only HTML, JavaScript and CSS
- You can add multiple shows in the same page.
Take a look at the examples in the BoardJS’s site. If you get familiar with commands, any presentation should take about 30 minutes to finish the code. What will take your time is thinking about the presentation and preparing its content. Now, let’s make an example to make the image clear.
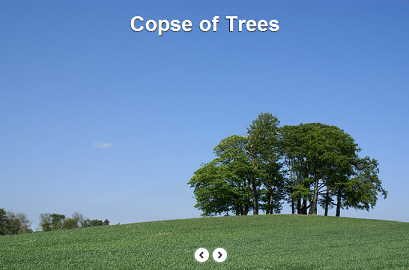
Look at the image below, this is a simple photo gallery.
To create this photo gallery or any interactive show, you will have to follow these steps:
1. Create objects and set their styles.
2. Set events for objects.
3. Set animations or some effects, it’s up to you.
Quite simple, huh ?
First of all, we have to create a global instance for BoardJS.
var TheBoard = BoardJS("TheShow")
For this example, we have to make a variable to remeber the current photo index and an array which contains the photos and their titles:
var CurrentIndex = 0;
var TheImages = new Array(
	"content/gallery/image1.jpg#Country Road",
	"content/gallery/image2.jpg#The Humber Bridge",
	"content/gallery/image3.jpg#Wind Farm",
	"content/gallery/image4.jpg#Copse of Trees",
	"content/gallery/image5.jpg#Green field Blue sky"
);
Now let’s begin the party.
Step 1: Adding Objects and Styles
– Adding Objects
The following code adds the title and navigation buttons
TheBoard
.background(TheImages[0].split("#")[0], 500)
.addText(TheImages[0].split("#")[1], 0, 20, "title center", "fromtop fade", 1000, "backOut", "TheName")
.addImage("content/gallery/next.png", 360, 410, "", "", "fade", 500, "linear", "nxt")
.addImage("content/gallery/prev.png", 330, 410, "", "", "fade", 500, "linear", "prv")
“TheImages[0].split(“#”)[1]” is the first index of the gallery.
“title center” is the class name of the object, they are defined in BoardJS’s css.
where “title” class defines the fontSize…
and “center” makes the text at center, always use left 0 if you want to use “center”
Other parameters are described well in the documentation.
– Setting Styles
.setStyle("nxt", "cursor:pointer")
.setStyle("prv", "cursor:pointer;display:none")
Hooray, we’ve done adding objects, now let’s set the events.
Step 2: Setting Events
We will set two events, the next and previous buttons to change between photos.
To set an event to any object, we use this function:
.addEvent(ObjectID, EventName, function () {})
Now when we click the next button, the current index, image and the text will change,
and of course, the previous button will appear.
First, we will move to the next index
CurrentIndex++;
Second, we will change the text and image according to the CurrentIndex.
TheBoard.html("TheName",TheImages[CurrentIndex].split("#")[1])
.background(TheImages[CurrentIndex].split("#")[0], 500)
Remember, “TheName” is the ID of text that we’ve added recently, the ID must be defined in .addText function to control it.
Third, we will show the previous button and check if the CurrentIndex reached the last photo:
TheBoard.setStyle("prv", "display:block")
if (CurrentIndex == 4) {TheBoard.setStyle("nxt", "display:none")}
Fnally, the code will be like this:
.addEvent("nxt", "click", function () {
	CurrentIndex++
	TheBoard.html("TheName",TheImages[CurrentIndex].split("#")[1])
	.background(TheImages[CurrentIndex].split("#")[0], 500)
	.setStyle("prv", "display:block")
	if (CurrentIndex == 4) {TheBoard.setStyle("nxt", "display:none")}
})
Now, we will set the event for the previous button, it the same of next button but with little difference:
.addEvent("prv", "click", function () {
	CurrentIndex--
	TheBoard.html("TheName",TheImages[CurrentIndex].split("#")[1])
	.background(TheImages[CurrentIndex].split("#")[0], 500)
	.setStyle("nxt", "display:block")
	if (CurrentIndex == 0) {TheBoard.setStyle("prv", "display:none")}
})
Step 3: Making the buttons more exciting
The photo gallery works well without this step, but we will make it more exciting,
by adding the hover on next and previous buttons:
TheBoard.hover("nxt prv", "scale:1.2", 300, "linear");
Now, after this function, when you put your mouse cursor over the buttons, they will be scaled
When you finish everything, call this function to run the show:
TheBoard.go();
To see how this example works, visit BoardJS’s webpage.
Thank you.
Requirements: JavaScript Framework
Download Link: http://board.porizm.com/
License: MIT, GPL License