Design a Golden Flame Text Effect in Photoshop
Photoshop offers one of the most robust graphics editing experiences available. Sometimes, we just cannot stop ourselves applying some nice effects to beautifully designed typefaces. Therefore, we have created our own amazing text effect photoshop tutorial for you.
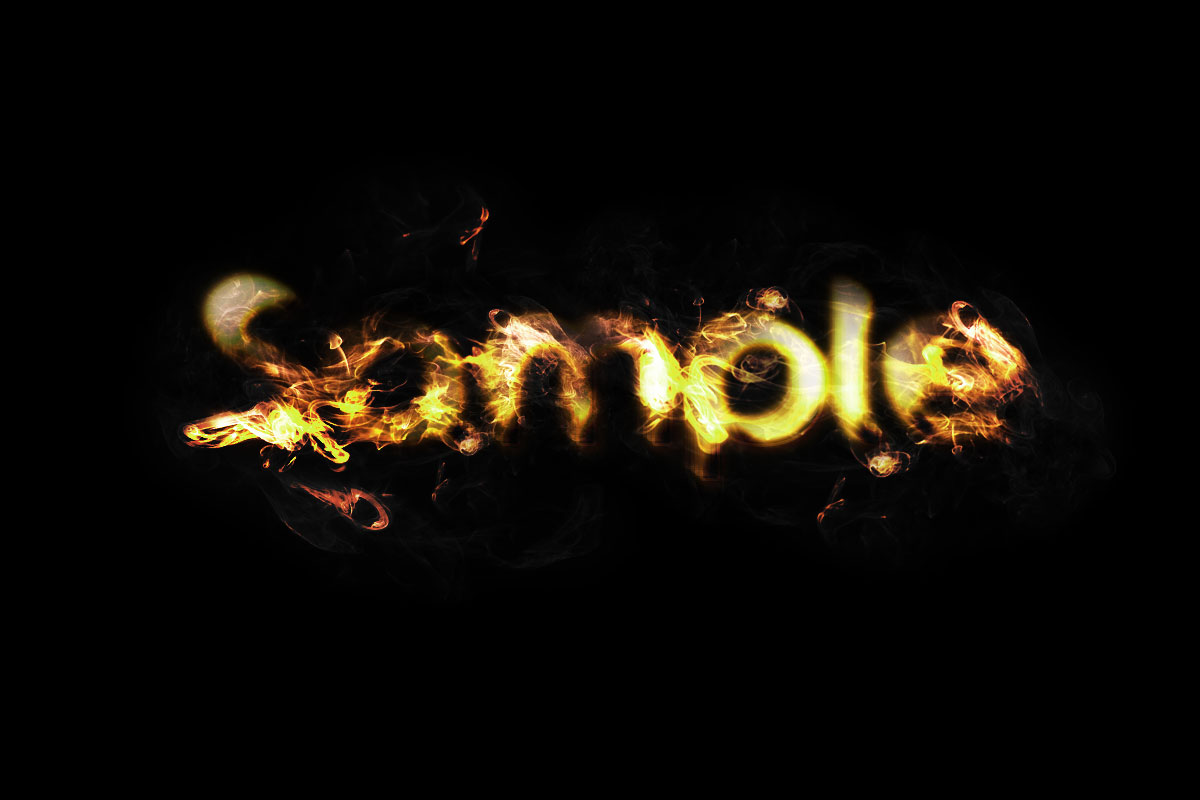
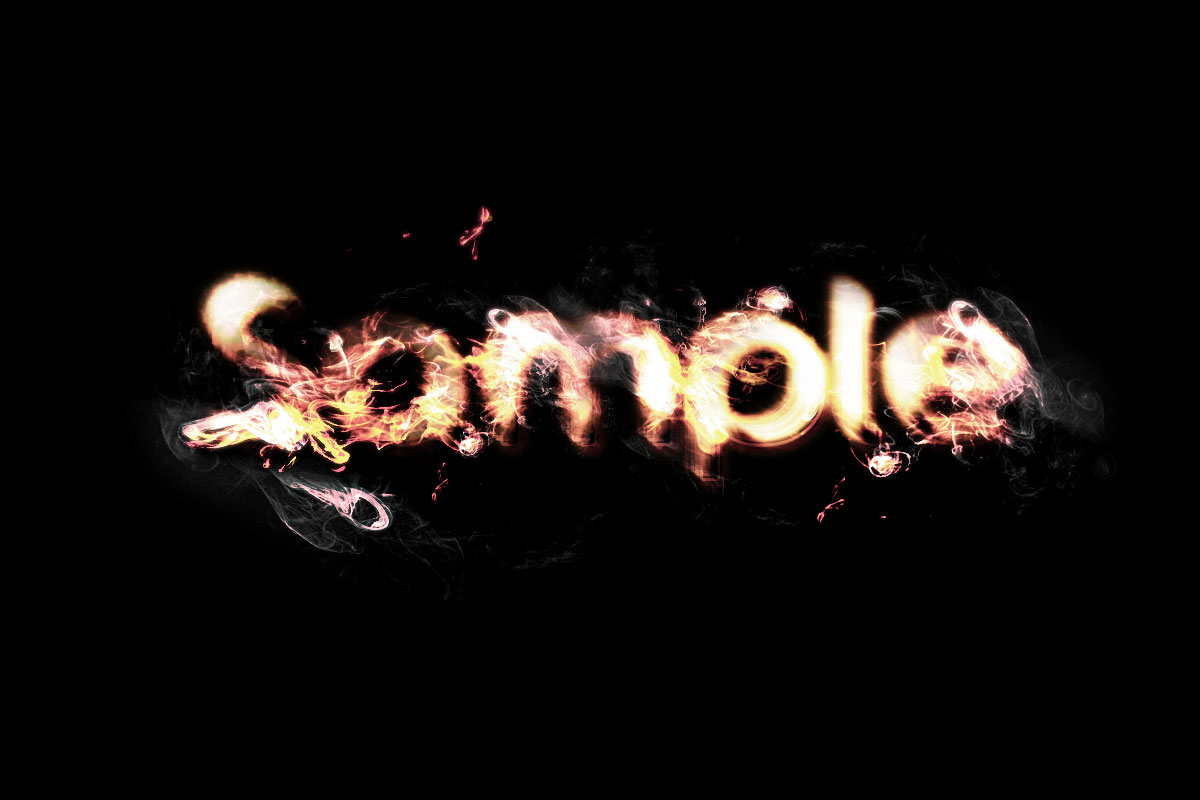
In this tutorial, I will show you the process involved in creating this golden flame text effect with soft smoke texture in Photoshop.
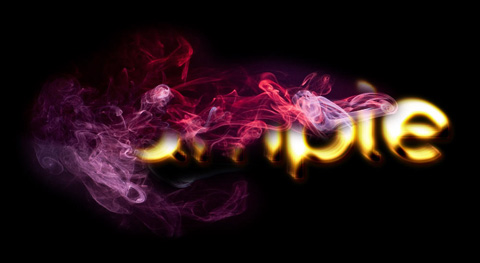
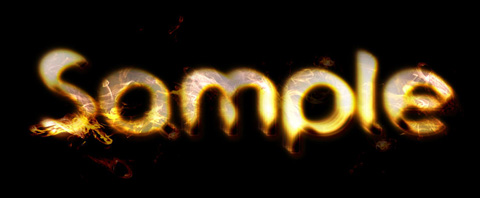
Final Result
To complete this tutorial, you will need the following stocks:
Font
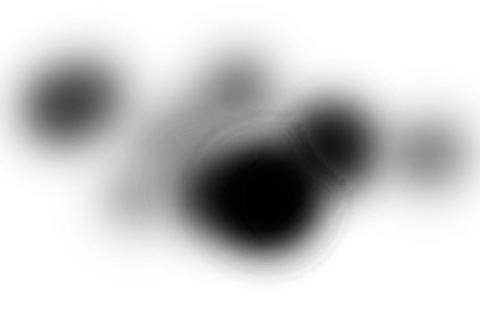
Soft Smoke Texture
Step 1
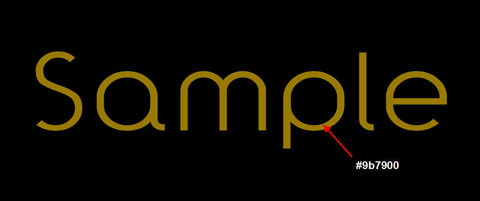
Create a new document sized 1200 * 800px, fill the background with black colour. On the background type, use the font we’ve just downloaded to type some texts onto it.
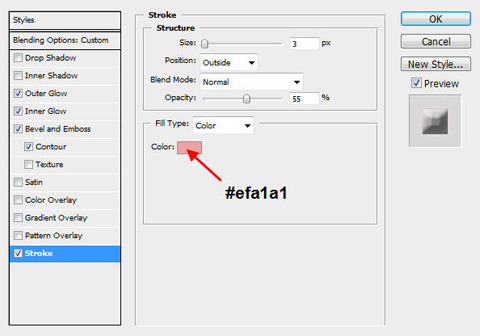
Step 2
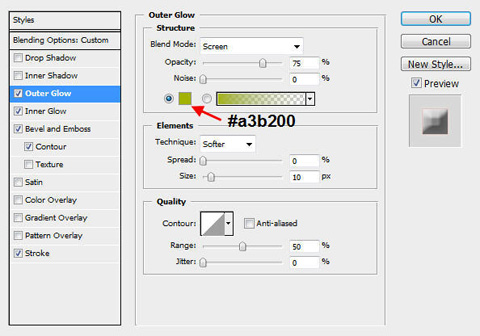
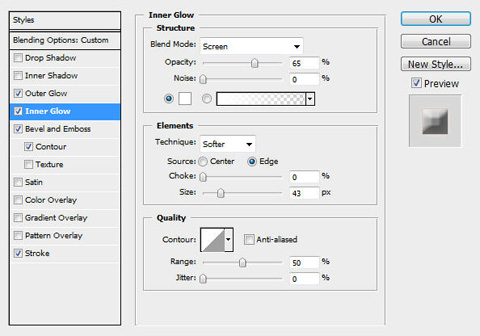
On the text layer, apply the following layer blending options:
Outer Glow
Inner Glow
Bevel and Emboss

Contour

Stroke
And you will have the following effect:

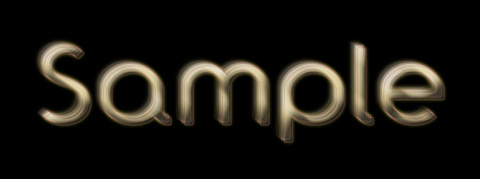
Step 3
Duplicate this text layer FIVE TIMES. For each duplicate layer, slightly adjust each layer’s position on the canvas, also alter the opacity of each duplicated layer for creating more depth. Here is what I have after adjusting each layer:
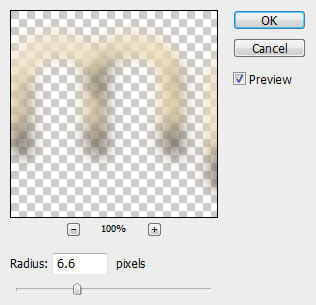
Step 4
Duplicate all preview text layer ONCE. Rasterize those duplicated text layers and merge the duplicated layers together. On the merged layer, apply the following Gaussian Blur Settings:
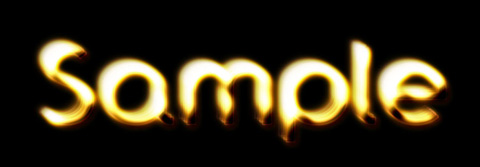
Change the blending mode of this merged layer to “Hard Lightâ€, you will have the following effect:

Rename this merged layer to “Glowâ€, we will continue to use this layer for the next step.
Step 5
Duplicate this “Glow†layer THREE TIMES. From bottom to top, adjust each layer’s blending mode and opacity according to the following settings:
Duplicated layer 1:
Blending mode: vivid light
Opacity: 90%
Duplicated layer 2:
Blending mode: overlay
Opacity: 80%
Duplicated layer 3:
Blending mode: soft light
Opacity: 70%
And you will have the following effect:
Step 6
Load the “Soft Smoke texture†into Photoshop, use the Lasso Tool with a 20px feather setting, select a portion of the smoke texture, copy and paste it onto our text document.
Use the Free Transform tool (Ctrl +T) to rotate the texture until reaching the effect as follows:
Name this new layer as “Flameâ€, duplicate it a few time. Again on each duplicated layer, use the Free Transform tool to rotate and resize, so that the shape of each layer differs from each other. Also make sure the Smoke Texture covers the whole text. Here is what I have after the Free Transformation:
![]()
Step 7
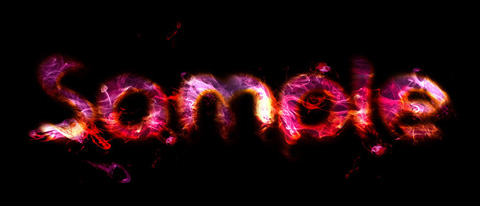
Merge those duplicated layers from the previous step and keep its name as “Flameâ€. Change the blending mode of the merged layer to “Hard Lightâ€. You will have the following effect:
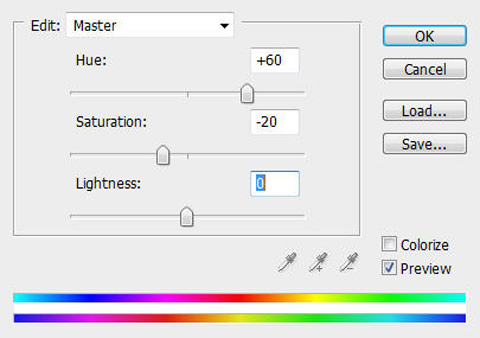
On this layer, hit Ctrl + U and apply the following Hue and Saturation adjustments:
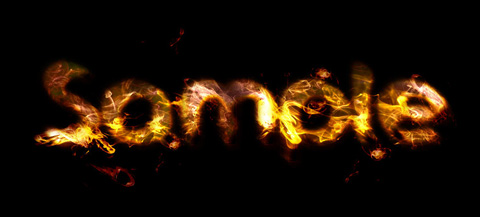
And you will have the following effect:
Step 8
Still on the “Flame†layer, add the following layer mask to it: (Hint: use a soft round brush with different flow and opacity settings to create depth)
Here is the effect after applying the mask:
Then we duplicate this “Flame†layer three times. Set the layer blending mode of the duplicated layers (from bottom to top) as “Hard Lightâ€, “Overlayâ€, “Overlayâ€. You will have the following effect:
Step 9
Now we can add some smoke around the text so it doesn’t look too isolated. To do this, duplicate the “Flame†layer one more time and remove the mask. Desaturate this duplicate layer, change the blending mode to “Screen†and decrease the opacity to around 30%. Here is what I have so far:
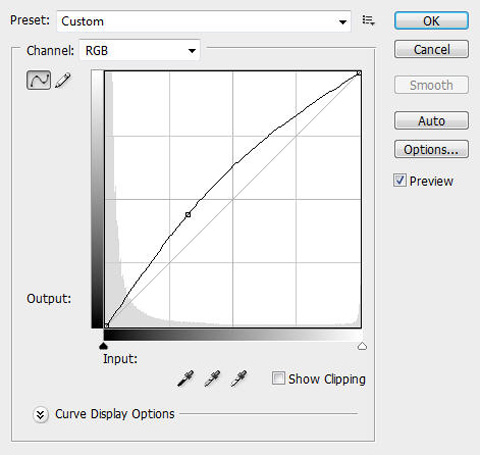
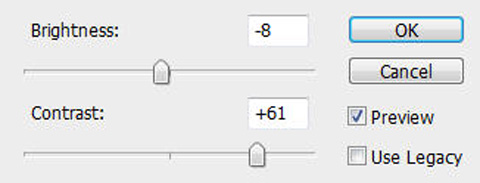
Step 10
For some final adjustments, I added the following image adjustment layers on top of all previous layers:
Curves
Brightness and Contrast
Hue and Saturation
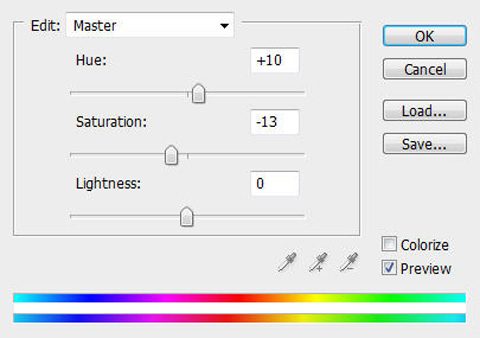
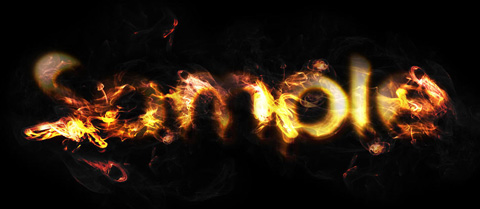
And here is the final effect:
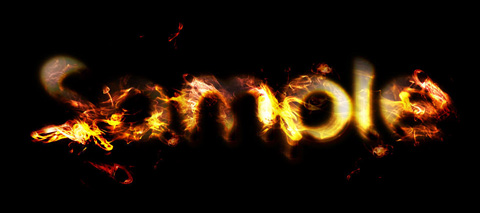
OK, that’s it for this tutorial! You can of course add some of your own texture or filter effect and see what the end results are! Remember to always keep your own creativity! Here is an alternative version I have: (adjusted the colour balance a bit)
Hope you enjoy this tutorial, drop me a comment if you have any question, I will try my best to help you out. Cheers and have a nice day!
About the Author
Hello, my name is James from Gold Coast, Australia. I love Photoshop as a hobby and have been playing around with it for a long time. I currently work full-time as a system administrator and run my Photoshop tutorial blog psdvault.com during my spare time.