Create a Content Rich Tooltip with JSON and jQuery
Today we’re going to break the mold of the traditional tooltip. This tutorial will demonstrate how to build tooltips that are powered by jQuery, with information pulled from a JSON array. Here’s a look at the final result that we’ll be looking to make:
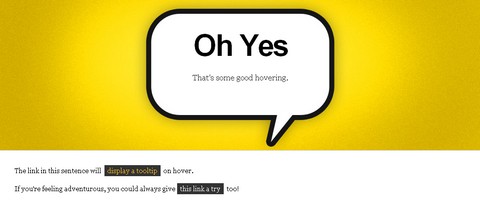
Our page will have two links. When a user hovers over a link, it will trigger the top banner to change its background image and text based on the entry in a JSON array. See the Demo
We’ll be using a pack of background images in later steps. You can grab those here.
Build the Page Structure
New File: I have called my HTML file ‘json-tooltip.htm” for this tutorial
Our example’s HTML is pretty self explanatory. We’re just blocking out a banner to contain the tooltip information, and then placing all of the normal content below.
Pay special attention to what’s going on with link anchors with a class of “tooltip” though. This is the class that will designate which links are tooltips. Also, you’ll notice that the “rel” attribute contains a number. This is the number we’ll use to associate a specific tooltip to an anchor link. This will become clear in a few steps.
<!DOCTYPE html PUBLIC "-//W3C//DTD XHTML 1.0 Transitional//EN"
		"http://www.w3.org/TR/xhtml1/DTD/xhtml1-transitional.dtd">

	<html xmlns="http://www.w3.org/1999/xhtml" xml:lang="en" lang="en">
	<head>
		<meta http-equiv="Content-Type" content="text/html; charset=utf-8"/>

		<title>jQuery/JSON Tooltip Demo</title>

		<link rel="stylesheet" href="json-tooltip.css"/>

		<!--Load up jQuery Library-->
		<script src="http://code.jquery.com/jquery-latest.js"></script>
		<script type="text/javascript" src="json-tooltip.js"></script>

	</head>

	<body>
		<div id="wrapper">

			<div id="banner">
					<h1>Go On</h1>
					<p>Hover over a link below</p>
			</div>

			<p>The link in this sentence will <a href="#" class="tooltip" rel="0">display a tooltip</a> on hover.</p>

			<p>If you're feeling adventurous, you could always give<a href="#" class="tooltip" rel="1">this link a try</a> too!</p>

		</div>

	</body>
	</html>
Size and Style with CSS
New File: I have called my CSS file ‘json-tooltip.css” for this tutorial
Since the bulk of this layout will be done in jQuery, the CSS is only responsible for sizing the banner div to proper size. I’ve also included optional font styles for presentation sake.
*{margin:0; padding:0;}

	body{font-family:georgia; background:#191919;}

		p{padding:0px 30px; font-size:13px; margin-bottom:15px; line-height:1.6em;}

		a{padding:3px 6px; background:#333; color:#FFF; margin:0px 3px; text-decoration:none;}
			a:hover{color:#FFC125;}

	#wrapper{margin:10px auto; width:960px; padding-bottom:30px; background:#FFF; border:1px solid ##F7F7F7;}
		#banner{background:#DDD url('purple-bg.jpg') no-repeat top left; height:300px; text-align:center; margin-bottom:30px; border-bottom:1px solid #CCC;}
			#banner h1{padding:55px 0px 15px 0px; font-size:60px; font-family:Arial, sans-serif; letter-spacing:-3px}
			#banner p{color:#333; font-size:16px;}
The Logic Behind JSON
Some of you may ask “Why use JSON to populate the ‘tooltip’?” The average Javascript tooltip is populated by the contents of the “title” attribute of the anchor link. This is a great approach for text only tooltips, but if you’re looking to add more information it can get a little messy.
This tutorial demonstrates one way that your tooltips can activate full body content changes using arrays, rather than pulling from various hidden elements on the page. This way we can include any number of elements to the layout besides text.
If you’re new to JSON, don’t panic. It is essentially a very simple way to build and access arrays in Javascript, much in the style of its PHP counterparts. You can also read a more comprehensive primer here for more.
Create Array with JSON
New File: I have called my Javascript file ‘json-tooltip.js” for this tutorial
For the sake of simplicity, there are only two entries in the tooltips array for this tutorial. As you can see below, each contains three fields:
1. A title (“Title”) to be loaded into the banner’s h1 tag.
2. The content (“Content”) to be loaded in the banner’s p tag.
3. An image url (“ImageURL”) to be loaded as the banner’s background.
Paste the code below into the top of your JS file to establish the tooltip array
//JSON banner content array
	var banner_data = {
		//Tooltips
		"tooltips" : [

			//Remember that the count starts at zero

			{
				//Array ID -> 0
				"Title"   : "Oh Yes",
				"Content" : "That's some good hovering.",
				"ImageURL"   : "yellow-bg.jpg"
			},

			{
				//Array ID -> 1
				"Title"   : "Nice",
				"Content" : "You found link number 2",
				"ImageURL"   : "orange-bg.jpg"
			}

		]
	}
Preload Images with jQuery
This is a quick fix to help keep things smooth. Because the jQuery will be referencing background images that are not loaded by default, it would be nice to have them preloaded to prevent further hiccups. For this we’re turning to a handle plugin that automatically preloads images once the document is ready.
To implement the preloader, we’ll first need to paste in the following immediately below the JSON array code from the previous step. This code declares a new jQuery preloader method.
// Image Preloader via http://www.innovatingtomorrow.net/2008/04/30/preloading-content-jquery
	jQuery.preloadImages = function()
	{
	  for(var i = 0; i").attr("src", arguments[i]);
	  }
	}
Next we’ll need to go through the entire JSON array on document ready and load the images in each entry. The loop I’ve written below will go through each and load the corresponding image, providing it is not empty.
Note: Remember that since this is where the jQuery starts, it goes within the document ready function along with the code from the next step.
//Actual jQuery starts here on document ready
	$(document).ready(function() {


		//Goes through each tooltip's image URL
		for(var i = 0; i < banner_data.tooltips.length; i++){

			image_location = banner_data.tooltips[i].ImageURL;

			//Preload if location exists
			if (image_location != ''){
				$.preloadImages(image_location);
			};

		};


	});
Show Tooltip Contents with jQuery
Here's where we get to the bulk of the jQuery for the page. Tooltips will be activated via hover, and then deactivated when the hover state is removed.
When a tooltip is activated, jQuery will populate the banner with the information from the corresponding JSON entry. This active tooltip is determined by getting the value of the tooltip's rel attribute.
Copy in the code below within the already active document ready function created in the last step.
$('a.tooltip').hover(function(){ //when hover starts

		//Get the ID of the current tooltip
		active_tooltip = $(this).attr('rel');

		//Replace the HTML in the header with data from JSON array
		$('#banner h1').html(banner_data.tooltips[active_tooltip].Title);
		$('#banner p').html(banner_data.tooltips[active_tooltip].Content);
		$('#banner').css("background-image", "url("+ banner_data.tooltips[active_tooltip].ImageURL + ")");

	},
	function(){ //When hover ends

		//Reset banner to defaults
		$('#banner h1').html("Go On");
		$('#banner p').html("Hover over a link below");
		$('#banner').css("background-image", '');

	});
Go ahead and give it a run! If you experience any errors, I recommend checking your results against the demo files available for download.
About the Author
Zach is a co-founder of One Mighty Roar, a web design company that runs a network of blogs centered on creativity. He and his twin brother are behind Build Internet, where he blogs on web design, development and business. Connect with him on Twitter for more.
Requirements: jQuery Framework, JSON
Demo: http://www.webappers.com/demo/json-tooltip/
Download: http://www.webappers.com/download/json-tooltip-final.zip
License: License Free